A polished finish often comes down to what happens before paint, stain, or topcoat. If you rely only on flat sandpaper sheets, you’ll feel the limits fast. Curves, edges, corners, and tight details are where uneven pressure shows up.
That’s where sanding sponges can change your workflow. With YNZDRWA’s 8 Pack Sanding Sponge set, you get flexible blocks that conform to surfaces while keeping your grip steady. You also get a simple grit lineup that supports step-by-step refinement.
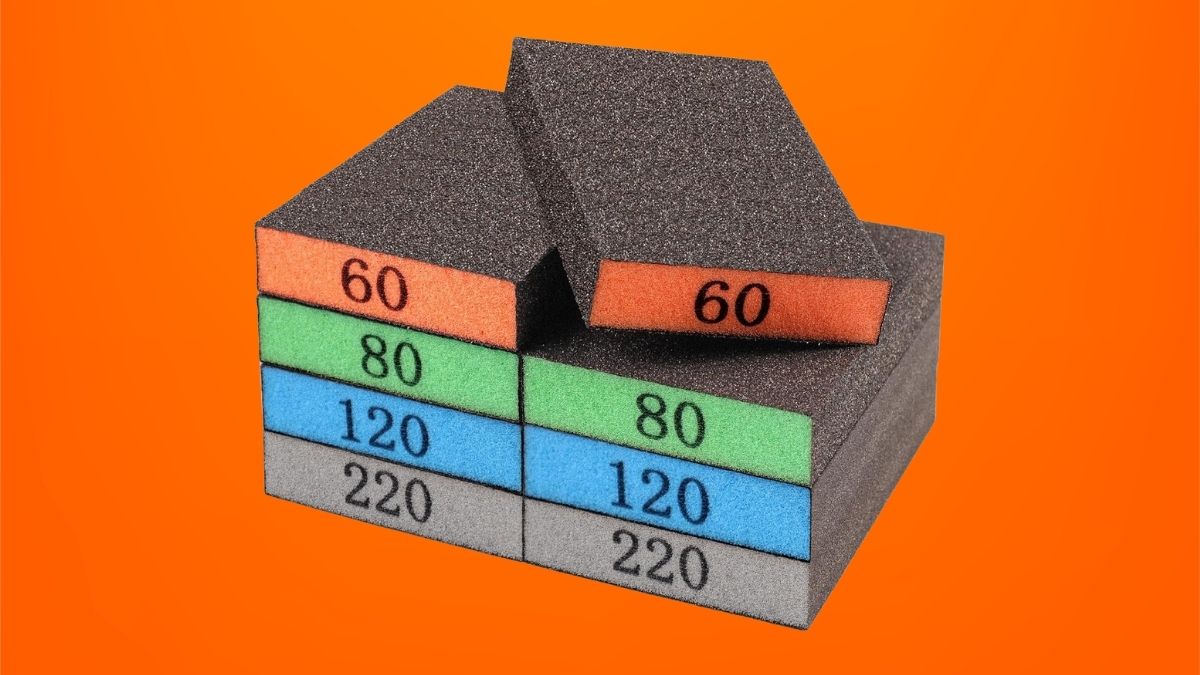
What you’re really buying with this set
These sponges use brown corundum abrasive and a bonded grit application method intended to help the grit stay put during use. In practice, that matters because grit shedding is what makes cheaper sanding tools feel “dead” after a short session.
The sponge backing is the other half of the design. Instead of fighting a rigid sheet that creases or folds, you can keep contact across rounded edges and slight contours. That helps you avoid pressure points that create dips or harsh scratch lines.
You also get a balanced grit spread. The set includes two blocks each of 60, 80, 120, and 220 grit, which covers most common DIY prep stages. If you like a straightforward system, this layout keeps you from overthinking the process.
Where you’ll notice the difference
You can use these blocks on a wide range of materials, but each use case has trade-offs. Seeing the “why” behind each application helps you choose the right technique.
- Woodworking: You’ll appreciate the control on edges, profiles, and trim. A sponge can ride curves and avoid flattening detail the way aggressive sanding can.
- Drywall: You can blend seams and corners with less risk of digging in, especially when you let the block do the work. Dust control is still important, but the feel is more forgiving than a sharp-edged sanding sheet.
- Metal prep: Coarser grits help you knock down rust or rough spots, and finer grits help you smooth before primer. You’ll want to keep pressure even, since metal shows scratch patterns quickly.
- Automotive and bodywork: The flexible backing follows panel curves better than flat paper. Wet sanding can also cut dust and improve consistency, but you’ll need good cleanup habits.
- Crafts and small repairs: The compact size is ideal when you need accuracy more than speed. You can also cut a sponge into smaller pieces for tight spots.
How to pick the right grit without wasting time
You’ll get better results if you treat grit selection like a progression. Start coarse only when you need to remove material fast, then step down to refine the surface.
- 60 grit: Use when you’re stripping, shaping, or removing heavy defects. It’s efficient, but it can leave deep scratches if you rush the next step.
- 80 grit: A practical “workhorse” grit for smoothing rough surfaces and correcting marks left by 60.
- 120 grit: Your prep grit for getting surfaces finish-ready without over-sanding. It’s also useful between coats when you need light leveling.
- 220 grit: Your final smoothing grit before stain, paint, or clear coat. It helps reduce visible scratch lines and improves finish uniformity.
If you’re aiming for the cleanest finish, your surface should look consistent before you move on. If you can still see the scratch pattern from the previous grit, you’ll likely see it after finishing too.
Wet vs. dry sanding: two perspectives you should weigh
Dry sanding is simpler and faster. You’ll often prefer it for raw wood and quick surface prep, especially when moisture could raise grain or affect the material.
Wet sanding can reduce airborne dust and slow clogging, which can extend the usable life of the abrasive surface. It’s also helpful when you want a finer-looking finish on metal or automotive surfaces.
The downside is that wet sanding adds cleanup and drying time. If you store sponges damp, you risk odor, mildew, or degraded performance. If you plan to sand wet, you’ll want a consistent routine for rinsing and drying.
Real-world value: DIYers vs. pros vs. budget-minded users
If you’re a DIYer, the biggest win is versatility. You can do a lot of prep work without switching tools constantly, and the sponge shape supports better control on tricky edges.
If you’re more experienced or working “pro-adjacent,” you may treat these as a companion tool. You can use power sanding for large flats, then switch to sponges for contours, corners, and finishing passes.
If you’re budget-focused, reusability is the key argument. Rinsing and reusing can reduce how often you buy disposable sandpaper. If you care about waste, fewer thrown-away sheets also means less shop trash over time.
Care tips that actually make them last
Rinse the sponge after use, especially if you notice loading or clogging. Let it dry fully before you store it. If you want more precision, cut a sponge into smaller sections for detailed areas. This can help you reach corners and narrow profiles without crumpling a full-size block.
Why this sanding sponge set is a practical buy for your toolkit
If you want more control on curves, cleaner edges, and smoother finishes without constantly replacing sandpaper, the YNZDRWA 8 Pack Sanding Sponge set is a practical upgrade. The mix of grits lets you move from rough prep to final smoothing without switching tools, and the flexible sponge design helps you avoid uneven pressure on detailed surfaces.
If you’re ready to simplify your sanding setup and get more consistent results, you can check out the YNZDRWA 8 Pack Sanding Sponge set on Amazon and put it to work on your next project.